
A friend pointed out to me the other day, that things I think are simple and easily done, are things that some people might not know how to do.

And even though I thought she was just being extremely kind, perhaps she has an idea.
I've been trying to make this a more helpful blog. And by NO MEANS am I an expert, but I thought I would just share some simple tricks I've learned, over time, when it comes to painting and crafting.

I like big dots. I cannot lie. Its just one of those things for me...kinda like gingham. They both just make me happy. And years ago, in a tole class we learned to paint dots with the end of a stylus. Those were tiny dots.

But on the letters above I wanted bigger dots. Let me show you how. So grab a clean, never used, pencil with an eraser. Squeeze a fresh puddle of paint...

...and put the eraser in, straight down. Then "pop your dot" wherever you would like it, pressing straight down onto your paper or whatever you choose to be "dottin".

Here I've chalked out the placement. But when I do it, I usually just free hand and eyeball. Wow. That sounds really weird...freehand and eyeball. So once you have down the dots, here's how to do the "Polka" part:
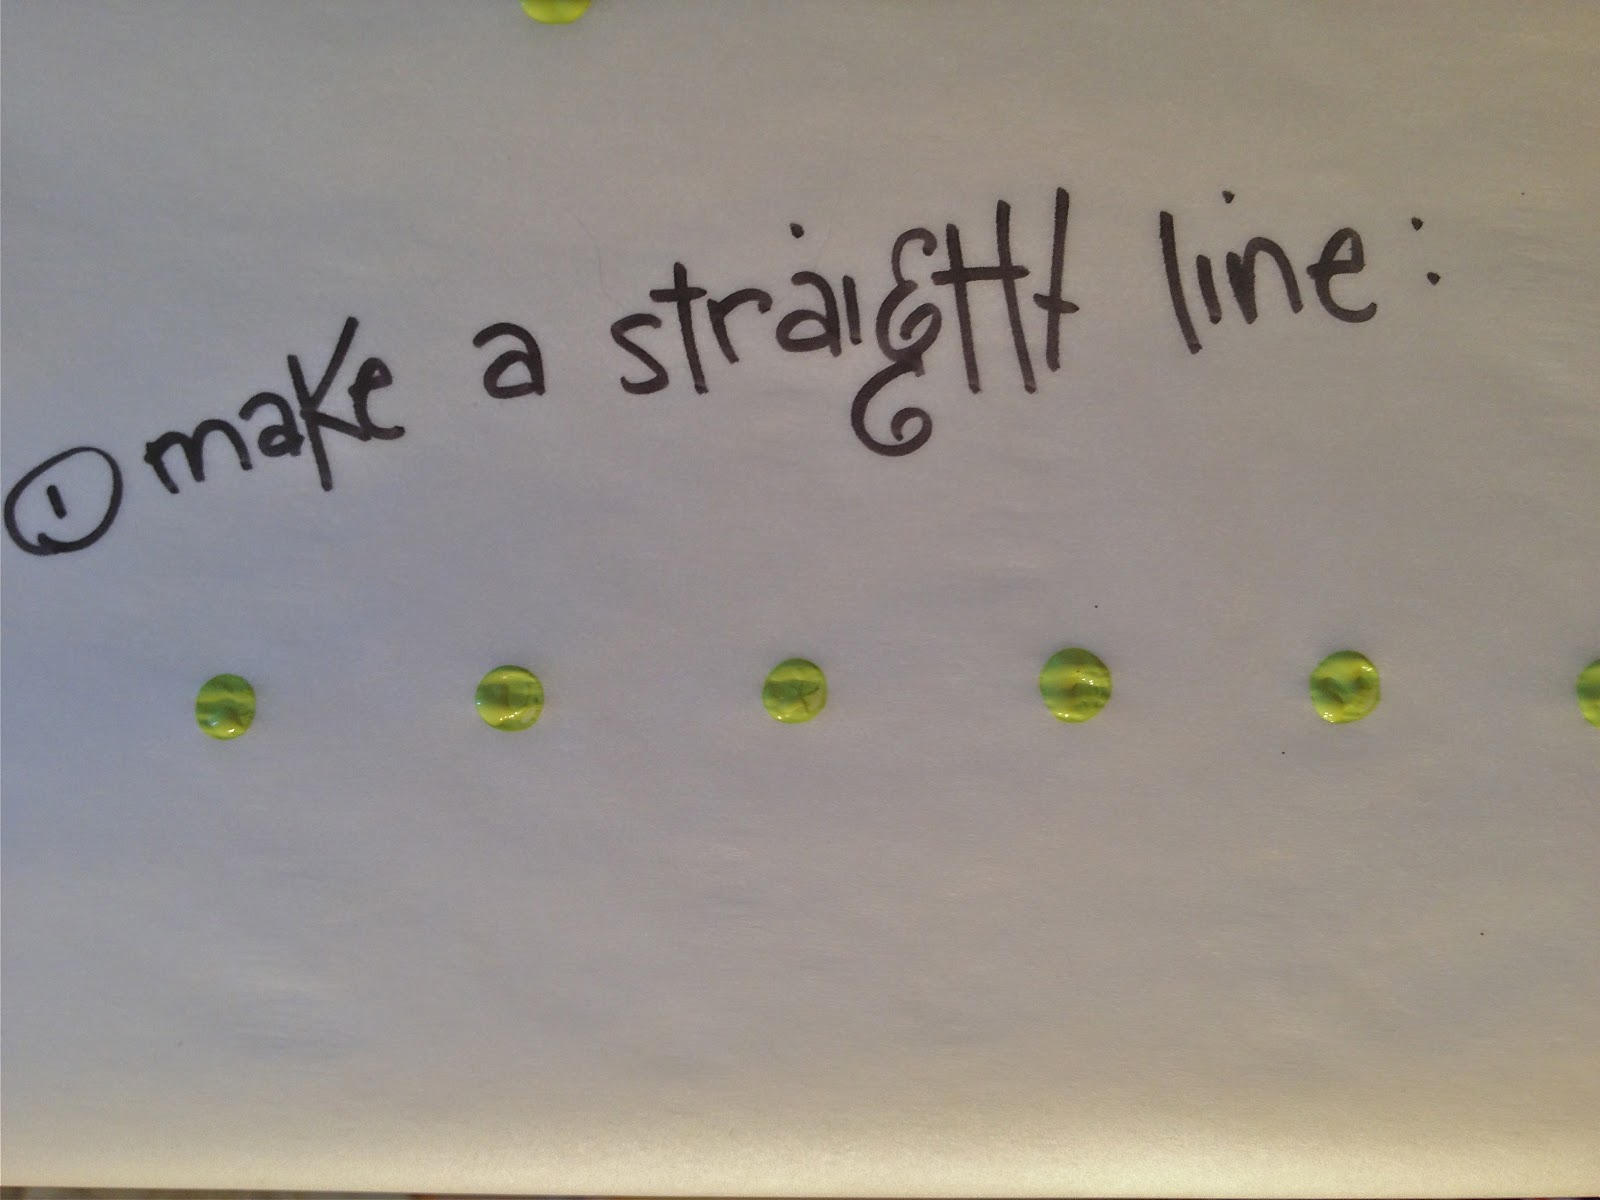
To make a Polka pattern...just start with a straight line. Again, I just eyeball the space, but I've been doing this for a long time. These are roughly an inch apart.

Make your second line of dots, above the first line. Place them above the empty spaces on the first line.

Now fill in the bottom line in the same manner, spacing your dots in the empty space below the first line of dots (and they should roughly line up with the top line of dots). And viola', Polka Dots. Keep going in this manner of straight lines, until you fill in the area that you want Polka Dots.

Which is exactly what I did here. Now some of them I spaced on the edge, to give it the look of fabric. And sometimes you might have to go in and put a second dot of color down, to fill it in the dot completely.

Once its all filled in nicely, you have your polka dot pattern on your item of choice.

On the picture above, I used the dots to decorate an egg carton that is going to be used for an Easter swap.

I was just playing around and dotted a napkin. But this is fun to use with gift wrap, lunch bags, enhance scrap book paper, or make dots in your journal. Anything that you want dots on, furniture, jars, tins...whatever works with paint. Inks work great too.

And if you want a smaller dot, just flip the pencil around, sharpen the end, and use the pointed lead as your stylus. And don't forget, always use a fresh puddle of paint. You could even do a tiny dot in a large dot. Yep, go crazy.
Dots do make me happy! Have fun with the Polka!

saw these in person along with the canvas art you have been working on- awesomely cute!
ReplyDeleteyou go girl thanks
ReplyDeleteI use a pencil too! :) Love this Cindy.
ReplyDeleteYou are a clever girl as well! I love these tips and I am SO glad you shared them! I agree with your friend, this would be a great regular addition to your blog! Glad I stopped by - it's been awhile. ;)
ReplyDelete