Monday, March 25, 2013

Fun Shop, Texas Pearls & Company!

Wall of Shutters
My favorite quote from the book Peter Pan is this, "It is wonderful what clever girls can do".   I love that.  Its put the focus on the positive and uses a word that we American's don't use nearly enough.  The word "clever".  


With all that being said, let me show you the shop of my friend Mandy, who is a very clever girl indeed.  


Mandy, along with her biz partner Julie, loves junk and home decor.  And paint.  And it all makes for a wonderful combination.  They put the "fun" in funky, y'all.  


Love this spiraling upwards display of vintage framed crewel work.

Old lamp shades almost look like bells, hanging in a mass.

Their favorite thing to do is to give old junk a facelift. Clever combo's of added wood bits and a fresh spot of paint can do wonders for a piece of furniture that has seen better years. And speaking of paint, they carry two wonderful lines and teach classes on how you can repaint your own vintage (or new) pieces.


Country Living Paint, as well as...


Maison Blanche.  Heck, even the cans are cute!


Cute home decor, props for weddings and showers and more, are just what you will find at Teas Pearls & Co.  Go see em at www.texaspearls.com or www.facebook.com/Texas Pearls.  And tell em, Yapping Cat sent ya.   Cause she is very clever too!


Rolodex Art on a Vintage Recipe Card


Oh, how time does fly.  Seems like the weeks go zooming by.  But I did get some "creatin" time with some crafty chicks and I stole a lotta supplies and made this cheeky little dude.  

I'm hosting a swap for several of the Cowgirls and we are doing Rolodex Art. So far, I have the one above done.  ONLY twenty four more to go.  :)  


Wednesday, March 6, 2013

Egg Carton Vintage Supply Easter Swap


Thought you might like to see a little swap carton that I created for my playing partner, Donna.  I really enjoyed putting this cute carton of goodies together for her.  Glitter, crocheted roses, vintage seam binding, a vintage strawberry and flowers.  Even a wee vintage pink chick. 


A frozen Charlotte looked like white chocolate to me.  An itsy bitsy nest and to the left is that VERY vintage plush chick.  She was a flea market find...so old and very sweet.  German scrap and pink baubles that reminded me of eggs all tucked into a pink painted polka dotted egg carton.  


I had so much fun gathering these goodies in pink and blue, with a touch of silver and just a tiny bit of red.  I hope Donna liked them too.


This was the carton that I did the polka dots on.  I added some paper embellishment to the top.  And tied it off with some fun garland I found at the dollar store.


I love putting together Donna's creative goodies.  I hope she will be inspired to create and to have fun.


Monday, March 4, 2013

How to Make Dots and Polka, but not Dance


A friend pointed out to me the other day, that things I think are simple and easily done, are things that some people might not know how to do.  


And even though I thought she was just being extremely kind, perhaps she has an idea.  

I've been trying to make this a more helpful blog.  And by NO MEANS am I an expert, but I thought I would just share some simple tricks I've learned, over time, when it comes to painting and crafting.  


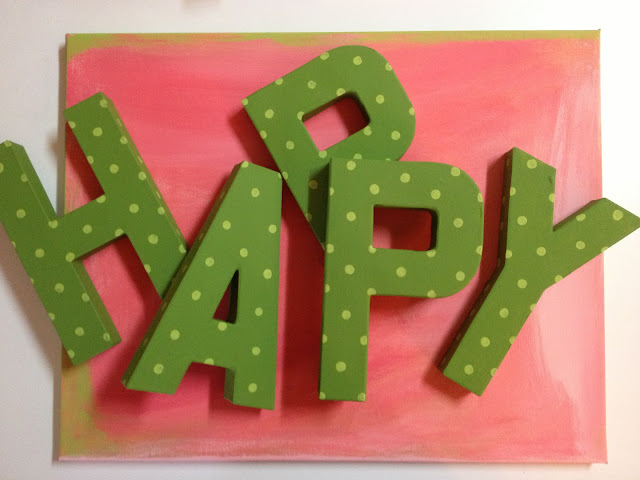
I like big dots.  I cannot lie.  Its just one of those things for me...kinda like gingham.  They both just make me happy.  And years ago, in a tole class we learned to paint dots with the end of a stylus.  Those were tiny dots.  


But on the letters above I wanted bigger dots. Let me show you how.  So grab a clean, never used, pencil with an eraser.  Squeeze a fresh puddle of paint...


...and put the eraser in, straight down.  Then "pop your dot" wherever you would like it, pressing straight down onto your paper or whatever you choose to be "dottin".  


Here I've chalked out the placement.  But when I do it, I usually just free hand and eyeball.  Wow.  That sounds really weird...freehand and eyeball.  So once you have down the dots, here's how to do the "Polka" part:


To make a Polka pattern...just start with a straight line.  Again, I just eyeball the space, but I've been doing this for a long time.  These are roughly an inch apart.  


Make your second line of dots, above the first line.  Place them above the empty spaces on the first line.


Now fill in the bottom line in the same manner, spacing your dots in the empty space below the first line of dots (and they should roughly line up with the top line of dots).  And viola', Polka Dots.  Keep going in this manner of straight lines, until you fill in the area that you want Polka Dots.  


Which is exactly what I did here.  Now some of them I spaced on the edge, to give it the look of fabric.  And sometimes you might have to go in and put a second dot of color down, to fill it in the dot completely. 


Once its all filled in nicely, you have your polka dot pattern on your item of choice.


On the picture above, I used the dots to decorate an egg carton that is going to be used for an Easter swap.


I was just playing around and dotted a napkin.  But this is fun to use with gift wrap, lunch bags, enhance scrap book paper, or make dots in your journal.  Anything that you want dots on, furniture, jars, tins...whatever works with paint.  Inks work great too.  


And if you want a smaller dot, just flip the pencil around, sharpen the end, and use the pointed lead as your stylus.  And don't forget, always use a fresh puddle of paint.  You could even do a tiny dot in a large dot.  Yep, go crazy.  

Dots do make me happy!  Have fun with the Polka!